It turns out that a lot of my neighbors have mini-splits, so I got to take a tour of them and pick up some words of wisdom along the way. With summer coming on and potentially hot and smoky weather in fall, it’s a good time to think about some cooling that can also filter your air and offload gas heating emissions in winter. These mini-splits are so efficient that they cost just $2-3/day per day to cool your house and $2-5/day to heat it, all while using clean electricity.
First of all, though, what is a mini-split? It’s a combination air conditioner and heater that is split into outside and inside components. The outdoor unit looks something like a box fan. It has a heat pump that extracts heat or cold from the air with a refrigerant, then sends that hot or cold refrigerant into the house inside small copper pipes. Because the outside unit is relatively small and efficient, it is called a “mini” split setup. (2)
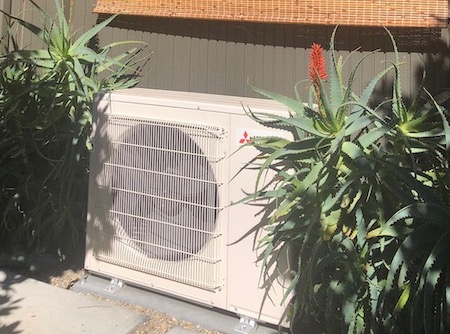
A 36,000 BTU Mitsubishi heat pump outside a Palo Alto home
One or more indoor units receive the refrigerant via those small pipes and use very quiet fans to distribute cooled or heated air inside the house. If a house has a good duct system, then one special-purpose indoor unit may be enough to condition the whole house. That unit, called an “air handler”, looks like a furnace and sits where a furnace would go. Its internal refrigerant coils heat or cool the air, then the air handler blows the conditioned air into the duct system.
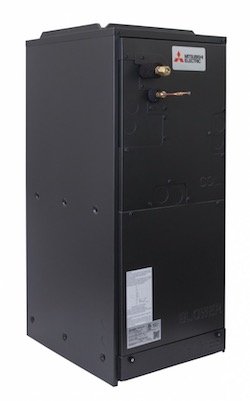
This furnace replacement works with a heat pump to heat and cool a ducted home. (Shown: Mitsubishi Ducted Air Handler)
If a house does not have a duct system, or the duct system has gaps, then the heat pump’s refrigerant lines go directly to one or more units inside the rooms of the house. (The refrigerant lines effectively mimic a duct system.)
A ductless indoor unit will often look something like this. These can go on almost any wall, though an exterior wall is easiest.
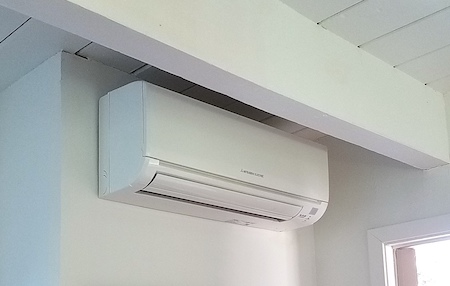
A 9,000 BTU Mitsubishi indoor wall unit
If there is space in an insulated attic or crawlspace, or behind a soffit, for a recessed unit like this, then only a vent is visible.
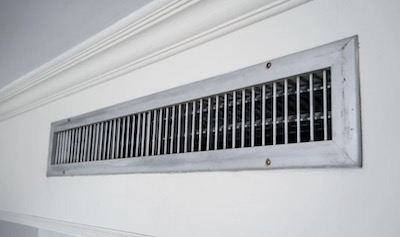
A horizontal indoor unit is hidden behind the grill on this soffit.
Other styles of ductless indoor units are available as well, as discussed below.
It’s best to keep the refrigerant lines between the outdoor heat pump and indoor unit(s) relatively short, since longer lines are harder to install and can result in temperature or refrigerant loss. Deciding where you will place the outdoor and indoor units is important. It’s one of several decisions you will need to make.
- Which part(s) of the house do you want to condition?
- How many outdoor units will you get, and what size?
- How many indoor units will you get, and what size?
- Where will you put the outdoor and indoor units?
I’ll go through each in turn.
Which parts of the house do you want to condition?
If you have a nicely ducted house, it typically makes sense to condition the whole house by replacing your furnace with an air handler, as mentioned above, But otherwise you have some choices.
Contractors will often set up you with a full-sized ductless system, one or two outdoor units and one indoor unit for each room. But that may be more than you need, or may not be the best setup for you. Many of us have rooms that stay more comfortable than others, or rooms where we spend the most time, or heat that works well in some rooms but not others. You may not need the complexity and expense of one fan unit in each room. Some examples of smaller installations that make a lot of sense include:
- You put a mini-split in the great room because it is large, has a lot of glass, and is where you spend the most time. It will make the most difference here. You don’t really need cooling elsewhere, and this one unit will do a lot in winter to reduce emissions from your gas heat.
- You need a mini-split in the new standalone office or ADU, or a room you are renting out. You opt to add an indoor unit or two in the nearby family room and bedroom since the additional cost of doing that isn’t too high.
- You put a mini-split on the south-facing side of the house, where the main living area and master bedroom get the warmest, and condition just those two rooms.
When you start with a partial system like this, you can add more components later if you want.
How many outdoor units will you need, and of what size?
Once you know which parts of the house you want to condition, it will be pretty clear if you want one or two outdoor units. You will typically start with one outdoor unit, for example a “2-ton” unit (24,000 BTUs) for a few rooms, or a “3-ton unit” (36,000 BTUs) for much of a well-insulated 2000 sf house. In some cases you may start with two outdoor units if the rooms you want to condition are far apart. Very powerful 5-ton units (60,000 BTUs) are also available.
You may want to consider energy used by a comparable house and work backwards. For example, if a house uses 3 therms for space heating on a typical cool day, then that translates to 300,000 BTUs for that day. If your heat pump is going to run 10 hours at 50%, 10 hours at 75%, and 4 hours not at all, then a 2-ton (24,000 BTU) heat pump would suffice: 24,000 * ((10 * 0.5) + (10 * .75)) = 24,000 * 12.5 = 300,000 BTUs. This gives you plenty of spare power for especially cold days when the heater is also less efficient. A bigger house, or a leakier house, would need more energy. Cooling generally uses less energy than heating in our climate, so this should suffice in summers as well.
How many indoor units will you need, and of what size?
As mentioned above, a well-ducted home may need just one indoor unit, a furnace replacement (aka “ducted air handler”). So this section focuses on ductless installations.
In a standard setup, your indoor units will add up to your outdoor unit. So if your outdoor unit is 36,000 BTUs (3 tons), then indoors you might have an 18,000 BTU unit in your great room and three 6,000 BTU units in bedrooms. However, if you have a lot of indoor units that you won’t be using at the same time, you might elect to install a “branch box” in a central location. A branch box is a sort of multiplexer for the refrigerant lines. One line goes from the outdoor unit to the branch box, then the branch box distributes the refrigerant as needed to the various indoor units. This setup is more complicated, but can help to make a single outdoor unit work for a widespread system.
A spacious “great room” with many windows will need an 18,000 BTU unit, or perhaps even 24,000 BTUs if it is poorly insulated. A standard large room will take 9-12,000 BTUs and a bedroom 6-9,000 BTUs, depending on room size and insulation.
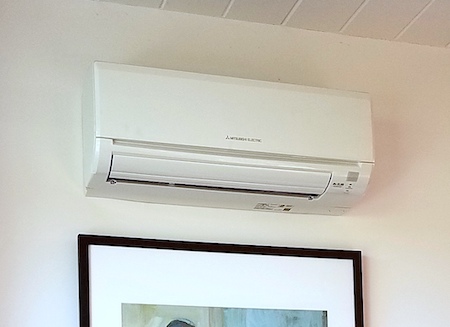
This 6,000 BTU wall unit is a good fit for a bedroom.
While most indoor ductless units are the wall-mounted type shown above, there are also floor-mounted units that can work for rooms without much wall space. Here is one that I saw in a house I visited. The room it is in has a lot of art on the walls, with no good space for a wall unit.
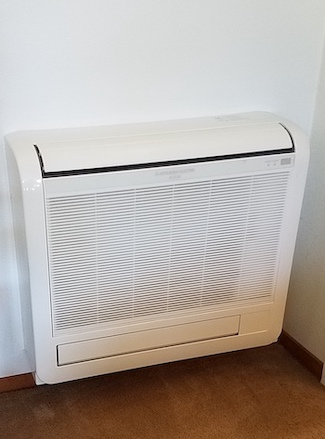
A floor-mounted unit is useful when there is little available wall space.
The owner said the installers told her it wouldn’t work especially well given its placement in a corner, but she has been very happy with it.
One family chose an LG system in part because they have a very interesting wall unit that looks like a picture frame. When it needs to blow air, the frame leans forward and panels open on either side, as shown below.
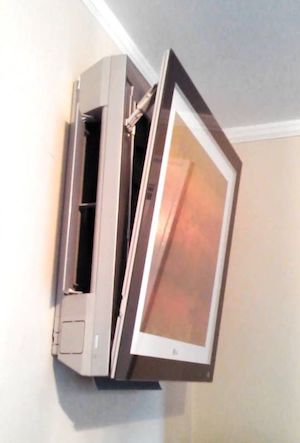
This wall unit by LG is disguised as artwork.
I was surprised that even the big units didn’t draw my attention too much. They are white, they are high up, and they generally blend in. What seemed to matter more to the homeowners was having the right size so the room temperature was comfortable. That makes sense to me.
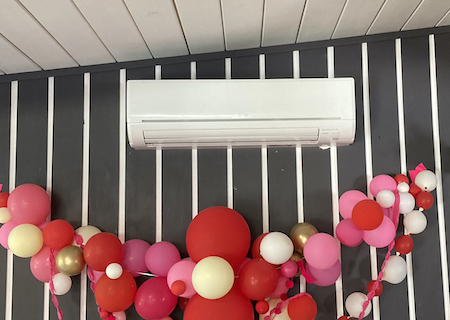
This wall unit provides comfortable air to a large living area.
Where will you put the outdoor and indoor units?
The outdoor units go along the wall of the house, preferably not in the sunniest place, perhaps where some plants can grow on either side. The outdoor unit(s) should be located relatively close to the indoor unit(s) to minimize line length. (Longer refrigerant lines can lose heat and cold, they can develop leaks if they have joints, and they can be difficult to get around corners.) The outdoor units are sufficiently quiet that the homeowners don’t notice the sound, and our setbacks are large enough that they don’t create issues with neighbors. (3)
The indoor units are typically placed on an exterior wall for easier access for the refrigerant and drainage lines. However, interior walls are possible. In some cases the unit can drain to a laundry area or bathroom area, or the drainage line can be routed through interior walls to the outside and a small pump attached to pull the condensate out. Some indoor units even have a condensate pump built in.
Most indoor units are centrally positioned in a room so they can distribute the temperature evenly. Some have temperature sensors to direct their vents to areas that need more temperature control, for more even distribution.
Cost
Nothing is cheap in our area. However, because these are so modular, you can generally install a system to suit your budget. If you want a 2-ton system to cool and heat your great room, it will be around $6,000, and that may be all you need. A 3-ton system in a ducted home may run $9,000-$13,000 installed. A 3-ton system with 3-4 ductless heads will cost around $12,000-$15,000. Prices vary. One thing to be aware of is that “finishing” the system can be time-consuming and therefore costly. A good-quality installation with 2-3 units can be done in one day, but may leave refrigerant lines uncovered.
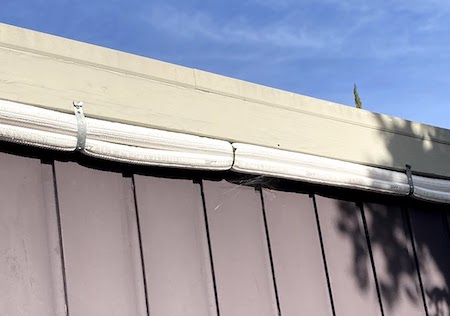
Uncovered refrigerant lines running between the outdoor and indoor units
Covering the lines helps to protect and camouflage them, but adds time and cost to the project unless the owner does it themselves.
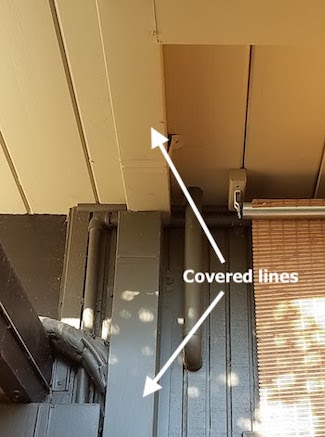
Lines can be covered in gutter-like casings (shown) or in round casings, then painted to match.
The complexity of the installation and the experience of the installer will affect labor hours, which affects cost. There are plenty of experienced installers offering good prices around San Jose, where they do more air conditioning than on the Peninsula.
Installing a Mitsubishi or similar mini-split yourself is not recommended since it requires expensive and specialized tools, chemicals and processes. However, there are brands focused on the DIY market, like this one and this one, with "quick connect" fittings and precharged copper lines, that are safer and more feasible for mechanically inclined homeowners.
How much will you pay for electricity? The cost depends on the size and how much you use it. A 2-ton system will cost maybe $2-$3 dollars a day to cool, and somewhat more to heat. (This is at Palo Alto rates). If you were to use 300,000 BTUs in one day, that translates to 88 kWh, but since most of this energy is drawn from the surrounding air, the amount you pay for will be only about 25 kWh. In PG&E areas, having electric heat allows you to get an additional 160 kWh per month at their lowest tier rate.
Other Considerations
Each indoor ductless unit comes with a thermostat (on-wall and/or remote) that you can adjust. Wireless adapters are available for a relatively small fee. Adapters that work with smart thermostats (e.g., Nest) are also available, though they are more expensive and may not be especially useful in many cases.
The most reputable brand is Mitsubishi, which was by far the most commonly installed unit that I saw. But Fujitsu also has a particularly good reputation, and brands like LG, Panasonic, and Daikin are making these mini-split systems as well.
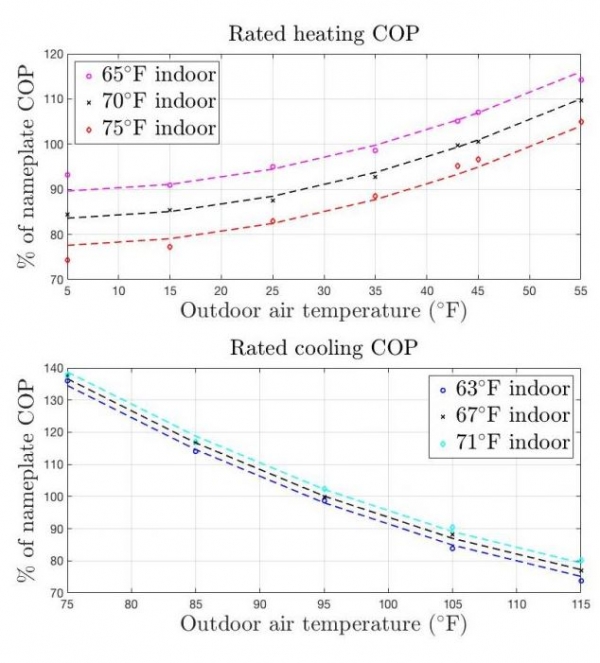
All of these mini-splits are quite efficient, but there are some differences. Efficiency is reflected in SEER scores (for cooling) and HSPF scores (for heating). These scores indicate how much cooling or heating you get per kWh. A typical Mitsubishi mini-split will have a SEER score of about 22, which is 50-100% more efficient for cooling than a standard A/C. It will have an HSPF score of about 12, which is about 3-4 times more efficient for heating than a gas or electric-resistance heater. You can compare these scores across mini-splits to see which will have lower bills and by how much. For example, a mini-split with a SEER score of 18 will have cooling bills that are 22% higher than one with a SEER score of 22 (22/18 = 1.22).
Please Share your Questions and Experiences
I hope this overview is helpful. Please share your questions or your own experiences with mini-splits in the comments, and we can help each other to learn about this option.
NEW! Redwood Energy and Menlo Spark have just released a new online Pocket Guide to All-Electric Retrofits of Single Family Homes that has lots of good information in it. Check it out!
Notes and References
0. Thank you very much to my neighbors Geeta Chaudhry, Joe Doniach, Ann Justice, Wayne Kau, Brian Lynch, Srdjan Petrovic, and Joel Truher for their tours and insights. Thank you to Josie Gaillard for her explanation of the ducted option. And thank you to Tom Kabat for his careful review.
1. They do make much cheaper “unsplit” versions of these that go inside rooms on external walls. The one-piece systems are especially useful if you live in an apartment. They are not as powerful, efficient, or quiet as split systems, but they are relatively inexpensive and easy to install. Here are some examples. More stylish ones may be coming available.
There are also portable models like this and this.
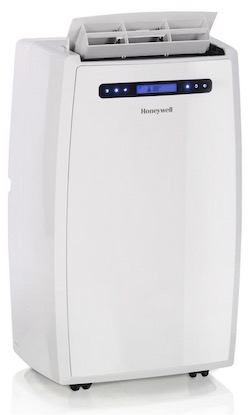
A small portable heat pump can provide heat and cooling on an as-needed basis.
2. In case you are wondering, there is a “maxi” version of these mini-splits. The one shown below is made by York and requires a duct system. The heat pump (shown on the left) sits outside the house and connects to an air handler (shown on the right) that fits where your furnace would go. The heat pump heats or cools a refrigerant and sends it to the air handler. The air handler then heats or cools air with that refrigerant and distributes the conditioned air throughout the house via the duct system. This is not considered a “mini” split because the heat pump is a little larger, may use more power, and can be noisier. On the plus side, this system might be somewhat cheaper.
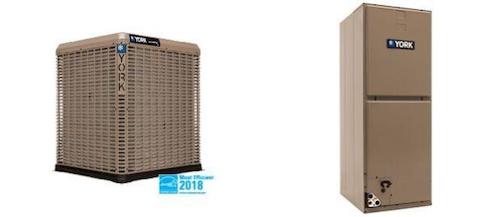
This York heat pump and air handler are a split system, but not a “mini-split”.
3. The outdoor heat pump will typically be around 13-14 inches deep and require 6-8 inches of distance from the house, for a total of 20-22 inches inside the setback. If you are not sure of your setbacks, you can look them up here for Palo Alto.
Current Climate Data (January 2021)
Global impacts, US impacts, CO2 metric, Climate dashboard (updated annually)
Comment Guidelines
I hope that your contributions will be an important part of this blog. To keep the discussion productive, please adhere to these guidelines or your comment may be moderated:
- Avoid disrespectful, disparaging, snide, angry, or ad hominem comments.
- Stay fact-based and refer to reputable sources.
- Stay on topic.
- In general, maintain this as a welcoming space for all readers.


